Thursday, June 7, 2012

Wash and Go…well, sort of

This is going to be a quick post on how I like to do a "wash and go" style on LA's hair.  This is the way I do it when I know ahead of time that I want to let her rock her hair loose. The night before, I co-wash her hair and then I use Kinky Curly Knot Today detangler ($12).  I run my finger through her hair in sections and make sure that her hair is completely tangle free.  I then use a small amount of Kinky Curly Curling custard ($17 for 8oz) to provide some hold.  I twist each section into two strand twists.  I do not worry about parting her hair because the twists will be taken apart in the morning and the parts will be hidden.  I do NOT use a comb at all when I style her hair this way, just my fingers, water and product.
I did this during her bath time a little bit before it was time for bed. She slept with the twists in over night.  The only reason I twist her hair is to keep it from tangling while she sleeps and to stretch her hair some so her fro won't be as shrunken as it usually would be.
This is how her hair looked in the morning after it dried.  The twists were sticking up every which way but it didn't matter because the twists are not that important to the style so they don't have to be neat.  I rubbed each twist with coconut oil (you can use any oil it was just the first one I grabbed) and slowly separated each section.  I then used my fingers to fluff her hair out and massaged her scalp to make the parts less noticeable.  I put on a simple headband and voila! Our "wash and go" hair :)
Thanks for reading and as always, leave comments or questions below.
Nace


Tuesday, May 29, 2012

Banding: Stretching hair without heat

I finally took LA's mini braids down. That was a long process.  I was going to do a post on LA's hair care regimen and how I was a detangle her hair but I forgot to take pictures.  I'll do that post next week.  This post is about how to stretch hair without using heat.  Heat can be very damaging to hair and can permanently change the curl pattern.  I have NEVER used heat on LA's hair.  There are alternatives for achieving a blow-dried effect. Take a look.  First, I washed LA's hair.
I used Kinky Curly come clean shampoo. It's sulfate free and costs $12 at Target.
Then, I conditioned and detangled her hair with Herbal Essences hello hydration conditioner. I LOVE this conditioner.  It is not all natural or anything like that but the way it makes my fingers glide through her hair is like nothing else. You can buy it at Walmart for $3.  
After I rinsed out the conditioner, I applied Cantu Shea Butter leave in.  I sectioned her hair off and put a generous amount on each section I was working with.  This is another product that is not all natural but it works for us.  Keep in mind that not all hair is the same and what works for us, may not work for you.  As with many things, you will have to try it out for yourself.  You can buy this at Walmart for around $5
Here's what banding looks like.  I section her hair off and wrapped hair bands around the sections, stretching her curls out.  I do this before she goes to bed so that her hair will be dry and ready to style by morning. You can make as little or as many sections as you would like, there are really no rules except do not use rubber bands or hair bands that have the metal piece connecting the elastic.
This is how her hair looks when I take the bands off.
After I ran my fingers through it a couple times.  You can see that her hair is stretched and has minimal shrinkage.  I achieved this WITHOUT heat and so can you.
As we know by now, you should never style dry hair so I oiled her hair and scalp really well with coconut oil.  I think I paid $8 or so for the one I use.
I then moisturized her hair with Shea Moisture Smoothie.  You can find it at Target, Walmart or Walgreens. It usually cost $10 but sometimes it might be on sale for 1-2 dollars off.
This is the finished look.  My child was not in the picture taking mood today so this is the best I could get out of her.
I didn't realize how much the front of her hair had grown so now I have to pin her braided bangs out of her face because she keeps pulling at them.  I wet her puff on top and used some eco styler gel to define the curls. And there you have it. :)

If you have any questions or comments, please feel free to post them below.  Thanks for reading.
Nace


Friday, May 25, 2012

Defining curls

Before all this natural hair talk, I had never heard of defining curls and for the longest time I had no clear understanding of what it meant.  I always noticed that LA's hair would curl when it was wet but I just assumed all natural hair does that when it's wet.  I had never really considered finding a way to keep it curly.  I used to spray her hair with water and oil and fluff her hair out with my fingers.  I thought her afro was the cutest.
This picture is how LA's hair looks when it's wet.
This is a picture of LA's hair dry with no product.

It was only after I discovered there were different types of hair (see what's your hair type page above), that I learned what products are best to use and how to define her curls. LA has 4a hair, which means it is full of tight springy definite curls that are the circumference of a crochet needle (very tiny). Teeny weeny spiral curls is what I like to call them. I started doing some research on what products other people with 4a hair use on their hair and I found Eco Styler gel.  There are many reviews on this product from the natural hair community and I figured I'd give it a try.
I chose to go with the one with olive oil.  This product costs $2-3 and you can find it at your local beauty supply store.  
 Description: Eco Styler Olive Oil Styling Gel contains 100% pure olive oil for deep down conditioning. Maintains maximum hold. Contains UV protection and helps your scalp regulate. Natural moisturizing system. For all hair types. Used by professionals.
       IngredientsWater , Carbomer , Hydrolyzed Wheat Protein , PVP , Glycerin , Triethanolamine , Sodium Hydroxymethylglycinate , Polysorbate 20 , Tetrasodium EDTA , Olive Oil , Fragrance , Blue #1 , Yellow #11
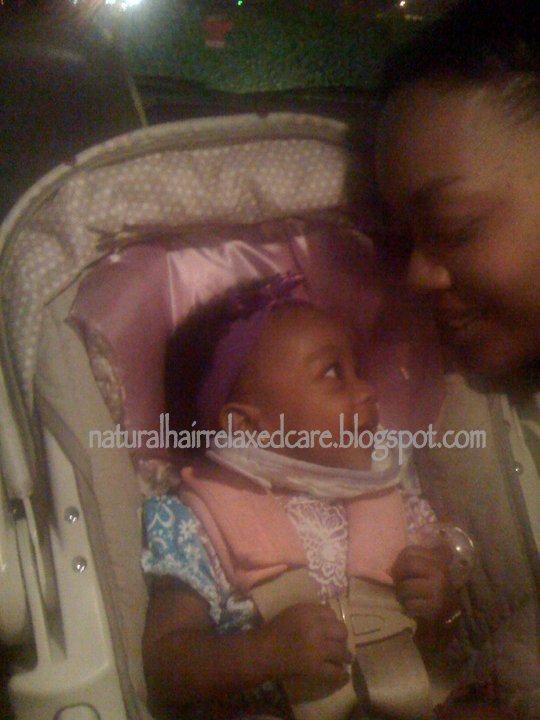
This is a picture from the first time I used eco styler gel in LA's hair and I LOVED it.
In order to define her curls, I washed her hair and conditioned it well.  After I rinse the conditioner out, I did NOT put a towel on it.  Rubbing a towel on her hair would have caused a great deal of frizz and that is not what I wanted.  I started in the back of her head and with her hair soaking wet, I apply the gel in small sections.  It is important to do this on soaking wet hair so make sure you have a spray bottle handy.  I smoothed the gel over small sections at a time and made sure I not to touch it after that.  Unnecessary touching will cause the hair to frizz and become puffy.
When working with kinky curly hair, you have to learn to accept shrinkage.   Shrinkage is what happens when the hair curls/coils and makes the hair appear to be a lot shorter than what it truly is.  There is really no way to combat shrinkage.  It is just something that is unique kinky curly hair.  It is way better to embrace the shrinkage than to fight against it.  Blowdrying and flat ironing excessively will cause heat damage which can not be reversed.  (You will have to transition that heat damaged hair the same way someone who is going from relaxed to natural would.   The hair is permanently altered) 

Product Review: I love eco styler gel.  The price is right and the results are wonderful.  The gel does make the hair a little crunchy but I found if you mist it with a little water, the crunchiness is manageable.  I would also recommend this product for people who have other hair types as well.  I have seen where some people use this gel to achieve a more defined twist out on 4b/c hair. 

Thanks for reading and feel free to comment.  If you use eco styler gel after reading this, send me a picture to naturalhairrelaxedcare@gmail.com and I may feature you on the blog. :)

Nace


Thursday, May 24, 2012

Protective Style Challenge: 139 Mini Braids

Ms. LA and I are doing Beads, Braids, Beyond's protective style challenge.  A protective style is a style that is meant to provide the hair with less manipulation and promote growth.  The object of the challenge is to choose a hairstyle that you will not have to comb, brush, style for at least a week.  You can not use beads, rubber bands, barrettes or any other type of accessory that will put stress on the hair. I chose to do mini braids because I wanted to challenge myself to make her style last the entire month of May. I did 139 mini braids in LA's hair on April 28, 2012.
On Week 2, I wanted to try something different with the braids so I braided them going forward and I put flexi-rod in the front to create a bang. I used Africa's Best herbal oil on her scalp and some eco styler gel on the front to make the curls last.
I had to wash LA's braids between week 2 and 3. I washed her hair and ran some Cantu leave in conditioner through the braids and braided them together to reduce the frizz.  I put bands around the braids to try to keep them from sticking up all over her head.
After her hair dried, I took her braids loose and the mini braids were crinkly all over.  I decided to style her hair in a crinkly mohawk.  I simply put her hair in 3 ponytails going down the middle of her head.

For week 3, we kept it simple.  I rewet her hair to try and get her braids to lay down after it was all crinkly.  Then, I just added a ribbon to the front.
Between week 3 and 4, I had to redo some of LA's mini braids since she decided that she wanted to style her own hair.  The braids were so frizzy at the end after she got a hold of them.
We are now at week 4.  For this week, I kept it simple and girly with pigtails.  Since we only have a week left, I did the front in cornrows instead of more mini braids.
We are almost to the end of our challenge.  I can't believe we've made it this long.  This is the longest I have gone without styling her hair and it is really making a difference.  I think we will make protective styling a part of our routine. Giving her hair and scalp a break ever so often will help to maintain her healthy hair.  

Thanks for reading
Nace


Monday, May 21, 2012

Don't be Discouraged

Sometimes, it may feel like all your efforts are in vain.  Don't be discouraged.  I am here to tell you that it does get better.  My daughter's hair was so patchy and uneven for the first year of her life.  I was so frustrated at times trying to figure out how to style it or what to put in it to help it grow/thicken. Along my journey, I have discovered that there is NO magic potion.  The hair will grow, it just takes time, patience and gentle hands.  The pictures above are a little over a year apart and you can see a significant difference.  Just know, if you stick to properly caring for your child's (or even your own) hair, it will all be worth it.

Thanks for reading.
Nace  

Sunday, May 20, 2012

Baby Hair

Fact #1: I prayed for a bald baby. Fact #2: I was blessed with the opposite.  I was so afraid of messing up my baby's hair.  I wanted, more than anything, to prove that natural kinky curly hair can grow long and be just as pretty as any other hair type but I was so unsure of what to do.  My solution was to leave her hair alone. For at least the first 5 months of LA's life, she was the "Headband Queen".  I think I had a headband to match every outfit she owned.  My logic was "the less I do to it, the better it will be".   The headbands worked out fine until Ms. LA was around 5 months old.  Her hair around the back and sides of her head thinned out so much that her afro was mostly on the top.  I could not stand the look of her uneven afro.  The time had come to style her hair (so I thought).

This was LA's first official hairstyle. It's called a veil and I learned how to do it from my favorite blog at the time, happygirlhair.com.  This blog has since been taken down but most of the info I have learned and will share, comes from there. I will post a description of this hairstyle, as well as instructions on how to achieve this look, in the near future.  I was happy with this hairstyle.  I didn't let it stay in longer than a day because I thought it might pull her hair at night.
Now that I was styling LA's hair, I needed a new product to moisturize her hair.  I went to the local beauty supply store and found a jar of Miss Jessie's Baby Buttercreme.  I had heard about Miss Jessie's products and since the price was so high, I figured it must be good.  (I will give a review of this product in another post.) I could not wait to get home and try this on LA's hair.
One thing I learned about natural hair was that you should never comb, brush or style DRY hair.  With my bottle of olive oil and water and my new jar of Baby Buttercreme, I was finally ready to braid LA's hair.  This is a picture of the first cornrows I ever did on LA's hair.  Her hair was so thin and patchy.  If you look closely at the picture, you can see where she didn't have any hair around the sides and in the back.  Those two braids in the back that are hanging down the furthest were the thinnest braids out of the bunch and that hair eventually fell out too.  I was SO proud of these braids.  I put the beads on the ends and I just knew her hair was cute regardless of how much scalp was showing lol.
These ponytails smh. Looking back now, I can laugh at my mistakes and hopefully someone can learn from them.  I thought these ponytails were everything. My poor baby lol.  Look at how thin the sides of her hair were.  I slicked her hair down with some Let's Jam and put her hair in 3 ponytail puffs.  Nobody couldn't tell me my baby's hair wasn't looking good.  Why couldn't I see how much hair she did NOT have?  This is what you don't do! Even though I was making sure the rubber bands weren't pulling on her hair, I should have left her hair alone at this point and just kept it moisturized.  She was still a baby so there was really no need to style her hair, especially in ponytails like this.
This style right here was my go to look.  I learned that it was better to make smaller ponytails instead of trying to pull all her hair together.  To achieve this look, I did finger coils.  I wet her hair with the oil and water mix, added a little buttercreme and twirled sections of her hair around my fingers.  This is where I started to get better at doing her hair.  

Baby Hair advice
  • Moisture, moisture, moisture.  It is very important to keep curly hair moisturized. Olive oil and water go a long way.


  • Stay away from sulfates.  Many shampoos like Johnson and Johnson's baby shampoo, contain sulfates. The most common sulfate is sodium lauryl sulfate.  Check the ingredients.


  • If you most use rubber bands, be sure to soak them in olive oil before using.  Rubber bands tend to be very try and can cause breakage.  If you use rubber bands to secure beads, be sure to remove the rubber bands every other day and moisture the ends of the braids. I do this by cutting the rubber band, removing the last bead, slide the remaining bead up and oil the ends of the braids.  I then apply a new oil soaked rubber band to the beads.  It seems like a lot of work but it is worth it.

  • Co-wash! Instead of washing the hair wish shampoo, try using ONLY conditioner every other time.  There is really no need to wash the hair with shampoo unless there is a lot of product build up.  Co-washing can help the hair retain moisture.  I co-wash LA's hair about once a week and I use shampoo as needed.


Those are the tips I have on baby hair for right now.   If you have any questions or comments, feel free to post.  Thanks for reading
Nace


Saturday, May 19, 2012

In the Beginning

This post is about the LA's hair care for the first couple of months.

LA was born April 2010 with a head full of hair. It was really soft,  had a curl to it and was very thin around her hairline (and still is two years later).  Before she was born, I did some research on natural hair. I read and learned about sulfates.  Sulfates are chemicals that are put in shampoos and detergents to make them lather.  Sulfates dry the hair out and strip it of it's natural oils but they are found in MOST shampoos.  After doing my research, I decided that I would only use sulfate-free shampoo on her hair.  I started off using Burt's Bees baby wash and shampoo. When I felt like her hair was dry, I used a mix of extra virgin olive oil and water in a spray bottle to refresh and moisturize her curls.  That was our first hair care regimen and I felt so proud of myself.


When LA got a few months old, I decided to look into products for children with natural hair.  I found "It's a Curl" online and I ordered the set. It came with shampoo, conditioner, leave in and a product that rewets the curls.  I fell in LOVE with this line of products.  She only had a little bit of hair at this point so the products lasted a long while before I ran out.

I don't have pics of the back of LA's hair but I started to notice the back of her hair was becoming thinner and thinner.  I really dreaded the signature baby bald spot in the back and I really wanted to minimize the thinning.  Once again, I searched online and read about satin. People use satin scarves and pillowcases to reduce breakage.  It occurred to me that her balding could be coming from all the places she lays her head, so I went out and purchased about a yard of satin fabric and sewed pieces of it to everything she rested her head on.  In the picture above, you can see where I sewed the piece to her car seat. I found that even though she did end up losing much of her hair in the back and sides, the satin did help to reduce the amount.